This tutorial is by request of LindaJP and was written using Corel Paint Shop Pro X. It will work in earlier versions as well as newer versions. I have included some freebie papers for you to use to work on this tutorial along with the custom gradient that we will be using. The papers are SOE (standard open end) candy wrapper sized. You can pick up the materials HERE.
Tools we will be using:
Custom Selection, Materials Pallet and Gaussian Blur
Step 1 – Copy the gradient from the zip folder into your gradients folder. For some this will be My Documents/My PSP Files/Gradients. For others, you may select to place them within the program file itself. That depends on you.
Step 2 – Open your PSP and then Open the 5 papers provided for this tutorial….or you can choose 5 papers of your own. If using your own, please be sure your papers are set to 5.25 inches wide x 5.50 inches high.
Step 3 – Minimize each paper so that it appears on the workspace below and out of your working area.
Step 4 – Create a new image using the following settings:
Step 5 – Click on your selection tool
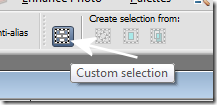
at the top, on your toolbar, select the custom selection icon
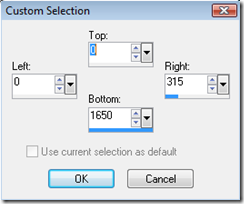
and use the following settings:
Step 6 – Click on your foreground selector in the material’s pallet:
Select the pattern tab then select the drop down arrow next to the pattern
Set your category to open images
Select one of the papers that you currently have open and use the following settings
Then Click OK
Step 7 – Click on your flood fill tool
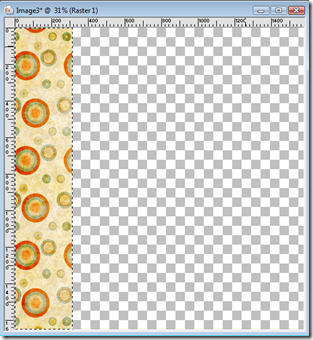
Then click with your left mouse button in the selected area to fill the selected area with the paper.
Your image will appear as below:
Step 8 – Click on your selection tool, custom selection, and use the following settings:
Select your second choice paper from the materials pallet and flood fill this area with the second paper. ((NOTE – Stripes appear better if you change your angle to 90 degrees when selecting the paper)) Just be sure to change your rotation back to 0 for the other papers. Your image will appear as below:
Step 9 – Go to selections tool, custom selection and use the following settings:
Flood fill with your third paper choice. Your image will appear as below:
Step 10 – Go to your selections tool, custom selection and use the following settings:
Flood fill with your fourth paper of choice.
Step 11 – Go to selections tool, custom selection and use the following settings:
Flood fill with the fifth paper of your choice. Go to Selections/Select None. Once all five papers have been added your image will appear as below:
Step 12 – Go to Layers/New Raster Layer and then click OK
Using your foreground selection tool in the materials pallet, click on the Gradient Tab. Using the drop down arrow next to the gradient, set your category to all, then select the RDD-RolledPaperGradient downloaded from this tutorial.
Set your gradient using the following settings:
Flood fill the new raster layer with the gradient selected. Your image will appear as below:
Step 13 – Go to Adjust/Blur/Gaussian Blur
and use the following settings:
Go to Layers/Merge/Merge Visible. Resize by 50% for faster loading to your website.
Your end product should appear as below:
Your rolled paper preview is now ready to be exported as a JPG file and used on your website, blog or for sharing on a forum.
SPECIAL NOTE: I already have this saved as a script and it is for sale at one of the online stores I sell in. Please DO NOT Script this tutorial for sale. You may script the tutorial for your own personal use, however.
I hope you have enjoyed this tutorial!


No comments:
Post a Comment