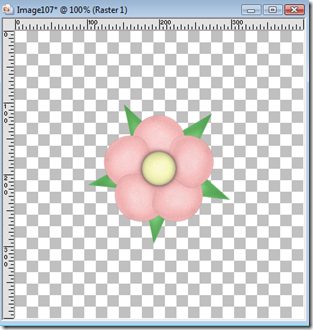
This tutorial uses tubes made from the Simple Vector Flower tutorial uploaded previously. You can follow the tutorial and make your own tubes or for this tutorial you can download 3 simple flower tubes I have already made for free HERE.
NOTE These tubes are for your use to follow this tutorial or for personal use only. Please do not make commercial items using my tubes. Thank you.
Now…on to the tutorial!
Step 1 – Create a new image using the following settings:
Step 2 – Using your Tube Tool select the first flower tube and change the size to 20 and place it on the workspace. Center the layer using the Center Layer script. Your image should look as below:
Step 3 – Add a new raster layer: Layers/New Raster Layer. Using your Tube Tool select the second flower and using the same size of 20 repeat the above step. Repeat the same steps using flower tube 3. You should have 3 layers as below:
Step 4 – Make the Raster 3 and Raster 2 layers invisible and then select the Raster 1 layer (It should appear blue if it is selected).
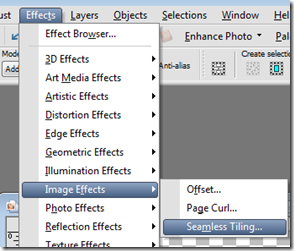
Step 5 – Go to Effects/Image Effects/Seamless Tiling
Use the following settings: (Then press OK)
Your image should now appear as below:
Step 6 – Using your Selection Tool create a rectangular selection around the center of the image:
Press the Delete Key and remove the center flower. Then go to Selections/Select None. Your image will now appear as below:
Step 7 – Make Raster 2 Visible. (Make sure it is in the center of the workspace) Then go to Layers/Merge/Merge Down. Your image will appear as below:
Step 8 – Make Raster 3 visible and make sure you have it selected.
Using your Pick Tool (Raster Deform is using PSP 9 and below) change the scale X and scale Y to 30%.
Your image will now appear as below:
Move the smaller yellow flower to just above the blue flower. Then make your Raster 1 and Raster 2 invisible.
Step 9 – Select Raster 3 layer and duplicate the layer. Then Rotate the copy layer by going to Image/Free Rotate/ and use the following settings:
Duplicate the copy layer and repeat the rotate on the new layer. Continue duplication and rotation until you have 8 small flowers in a circle and your image appears as below:
Then go to Layers/Merge/Merge Visible.
Step 10 – Make Raster 1 and Raster 2 Visible and then select Layers/Merge/Merge Visible.
Add a new raster layer and move it behind your flowers layer. Flood fill with your desired background color and then Layers/Merge/Merge Visible. (For this tutorial I used a white background) Now we have one more step before our pattern is ready for use. Go to Image/Resize and change resize it 50% so that your image is now 200 x 200 in size. Your image should now appear as below:
Export as a JPG file to My Documents/My PSP Files/Patterns (Give it a unique name) and you can use it for any project you may need.
Here it is as an SOE paper using the patterns fill at 100%
You can repeat this tutorial changing the flowers that are made into a circle or the center or corners. Just play with it and have some fun!
I hope you enjoyed this tutorial!


No comments:
Post a Comment