So it has been awhile since I have posted any tuts. I do apologize for that. I have been extremely busy getting ready to open a new online store. This tutorial was written by request of Latitude. It was written using Paint Shop Pro X but will work in earlier and newer versions as well. No external plugins are required for this tutorial.
Let’s create!
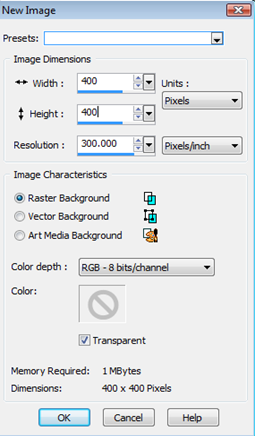
Step 1 – Create a new image using the following settings:
Step 2 – Click on your picture tube tool.
Select the tube you want to use from your choices and then adjust the settings as needed to fit the tube onto your work area. For this tutorial I am using a PSP tube I created from a poinsettia I have created. It is a large image so I am adjusting my tube settings to a size of 32 (see below)
Left click with your mouse and place the tube in the center of your image.
To ensure the image is centered, use your Center Layer Script that comes pre-installed with PSP. See Below:
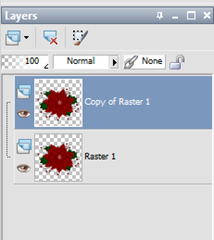
Step 3 – Right click on the Raster 1 layer and select Duplicate.
Your layers pallet will appear as below:
Step 4 – Click on the eye next to Copy of Raster 1 layer to make it invisible. Then Click on the Raster 1 layer to make it the active layer.
Go to Effects/Image Effects/Seamless Tiling
Use the following Settings:
Your workspace should appear as below:
You will notice there are transitional fading around the edges of the center flower.
Step 5 – Click on the eye of the Copy of Raster 1 layer to make it visible again. Your image will now appear as below.
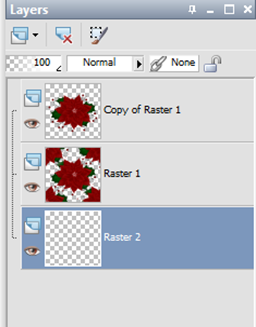
Step 6 – Make Raster 1 layer your active layer and go to Layers/New Raster Layer. Then drag the layer BELOW your seamless tile layer. Your layers pallet will appear as below.
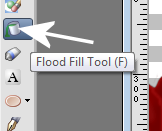
Step 7 – Using your flood fill tool:
fill the Raster 2 layer with the color of your choice. For this tutorial I am flood filling my background with black.
Your image will appear as below:
Step 8 – Now go to Layers/Merge/Merge Visible. Then save the file to your patterns folder for future use. Use it to flood fill areas of candy wrappers, make digital scrap papers from it or whatever you need it for without having to create it all over again.
You can play with the settings of your tubes. Make them larger to fill more area or make them smaller to allow more space between and add other tubes to it to fill the area. Below is a sample of using more than 1 tube to fill an area.
I hope you enjoyed this tutorial. If you have any questions, please don’t hesitate to ask.
Happy PSP-ing!


No comments:
Post a Comment