In this tutorial we will be making a custom flower shape. This tutorial was written in Corel Paint Shop Pro X but will work in other versions as well. For PSP 9 and down you will use the Raster Deform tool instead of the Pick tool. Keep that in mind while working this tutorial.
This is nothing fancy, but will create something pretty nice when you utilize the shape we are about to make. I will be writing a separate tutorial on using your custom shape. A link will be provided at the end of this tutorial.
Step 1 – Create a new file using the settings below:
Step 2 – Using your Ellipse Shape tool, create a circle using the following settings:
Foreground: Black
Background: Black
Mode: Draw Circle
Create on Vector Checked
Line width set to 0
Anti-alias Checked
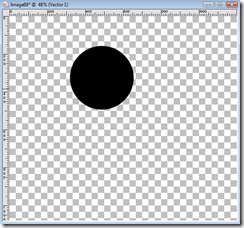
Your circle should appear as below:
Step 3 – Go to: Edit/Copy, then Layer/New Vector Layer then Edit/Paste as New Vector Selection. Paste on top of the existing circle. Using your Pick Tool (or Raster Deform)change the background color to a light gray.
Your image should appear as below:
Now select Image/Free Rotate and use the following settings:
Now, Edit/Copy this layer, add new vector, Edit/paste as new vector selection, change the background to black, and rotate. Repeat, changing the color to light gray. Continue this until you have 6 circles in alternating colors. Your image should appear as below once this has been completed.
Step 4 – Now, using your Pick Tool (Raster Deform for earlier versions) select the first circle. Hold down your Shift Key and select each circle until all 6 have been selected. You will see a square form around all selected circle. See below:
Now, go to Objects/Group. Your circles will be grouped together as one vector layer. Use your Center Layer Script and center the new vector layer.
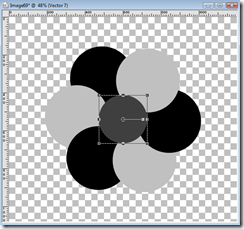
Step 5 – Change your background color to a dark gray and then add a new vector layer and add a new circle using your ellipse shape tool. Place the circle in the center of your circles. If you get it off center, that is ok, just use your Center Layer Script to get it into the center. Your image should appear as below:
Step 6 – Using your Pick Tool (or Raster Deform), select the center circle, hold down your shift key and select the grouped circles made earlier. Then go to Objects/Group. You will now have 1 vector layer showing all the vector shapes put together. Your image will have a square around it and appear as below:
Step 7 – Add a New Vector Layer. Keep the dark gray background and then using your Symmetric Shape Tool create a star using the following settings:
Mode: Draw Stellated
Create on Vector Checked
Number of sides 6
Line width 0
Anti-alias checked
Draw out a star shape and then center it on the layer.
Step 8 – Move the star layer behind the grouped circles. Using your Pick Tool (or Raster Deform) select the circles layer and then hold the shift key and select your star until there is a square around all of the vectors. Then select Objects/Group. Your image will appear as below:
Step 9 – Now go to: Objects/Properties and change the name from Group 3 to whatever you want to name the group. I am going to name this one MyFlowerShape.
NOTE: For each shape you create, you must create a unique name or risk shapes of the same name being overwritten!
Step 10 – Now export this as a custom shape. Go to File/Export/Shape.
Give it a unique name different than any other shapes you may have. Typically it is good to use your initials with a dash so you can easily find your own custom shapes. For example: RDD-MyFlowerShape. In this case, I am just naming it MyFlowerShape. Press OK and your new shape will appear in your shapes folder.
That is it! You have now created a custom flower shape! Please refer to the using your shape tutorial to learn how to make a flower using this shape.
I hope you enjoyed this tutorial! Have fun!


No comments:
Post a Comment