So, if you followed the Creating A Custom Flower Shape tutorial then this tutorial will show you how to utilize this unique looking flower shape. It is very simple really, and you can use patterns, colors or gradients for your new unique flower.
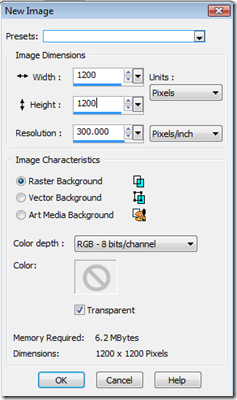
Step 1 – Create a new image using the following settings:
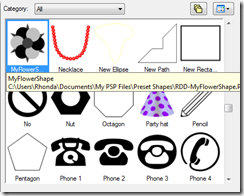
Step 2 – Using your Preset Shape Tool select the flower shape we created in the earlier tutorial. Be sure to have Retain Style selected before adding the selection to the workspace.
Starting at the top left area of the workspace press down on your left mouse button and drag to the far bottom right area of the workspace to place your shape on the canvas. Then use your Center Layer Script to center it on the canvas. Your workspace should look as below:
Step 3 – Using your Magic Wand select only the BLACK area of the shape. Go to Layers/New Raster Layer and flood fill with your preferred color, gradient or pattern. I am using some Christmas Canvas I already had made but you can use anything you would like for this tutorial. Your image will look similar to this below:
Keeping the area selected add a new raster layer then go to Effects/3D Effects/Cutout and use the following settings: (again, you can play with these settings until you reach something of your liking)
Then go to Layers/Merge/Merge Down then Selections/Select None. Your image should appear similar to below except with different fill.
Make the layer with your flood filled selection invisible and return to the vector layer where you placed the shape.
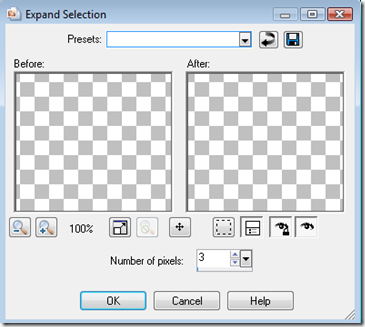
Step 4 – This area will be done slightly different. Select the light gray areas and go to Layers/New Raster Layer. Then Selections/Modify/Expand and use the following settings:
Flood fill with your desired color, pattern or gradient. Then go to Layers/New Raster Layer. Repeat the Cutout Effect then Layers/merge/Merge Down then Selections/Select None. Your image should appear as below.
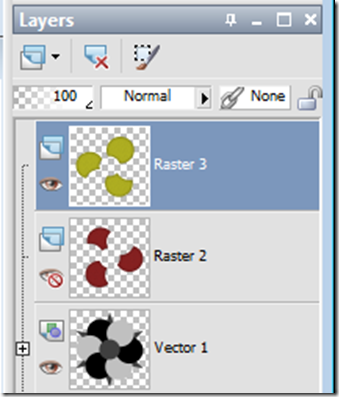
Move this layer above the first flood filled layer. So since I filled with red first, then the gold I should have gold layer, red layer (still invisible), then vector layer: See below:
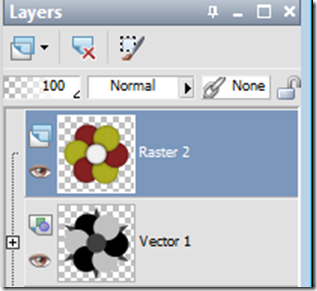
Now, make the Raster 2 visible again and then make sure you have Raster 3 selected and go to Layers/Merge/Merge Down. Your layers pallet will now look like this:
And your image will appear as below:
Step 5 – Select the vector layer where you placed the shape and using your magic wand, select the dark gray area in the center of the flower. Then select the Raster2 and then go to Layers/New Raster Layer (this should put a new layer ABOVE the Raster 2 layer.
Then go to Selections/Modify/Expand using the same settings as before. Flood fill with your desired color, pattern or gradient. Add a new raster layer Layers/New Raster and repeat the Cutout effect. Then Layers/Merge/Merge Down then Selections/Select None. Your image should appear similar to below:
Now we will add some depth to the center. Select the layer with your center circle on it (Raster 3):
Go to Effect/3D Effects/Drop Shadow and use the following settings:
Press OK. Repeat Drop Shadow but change the blur to 60. Optional (Depending on colors you are using and amount of depth you are wanting to achieve) repeat the drop shadow a third time and change the blur to 90.
Then go to Layers/Merge/Merge Down. Your image should now appear similar as the image below:
Your layers pallet should look like this:
Step 6 – Select the layer that has your shape on it. Then, using your magic wand, select the dark gray areas that represent the leaves. While still on the vector layer go to Layers/New Raster Layer then Selections/Modify/Expand and expand using the same settings as before. Flood fill with the color, pattern or gradient of your choice. Go to Layers/New Raster Layer and repeat the cutout effect as before. Then Layers/Merge/Merge Down and then Selections/Select None.
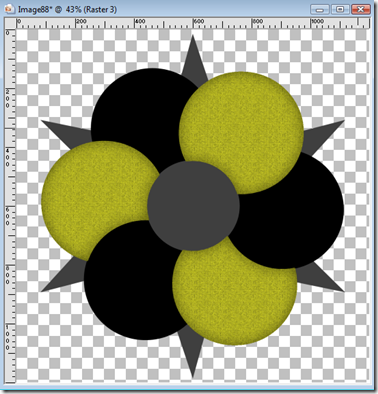
Your image will appear similar to the image below:
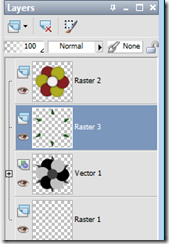
Your layers pallet should look like this:
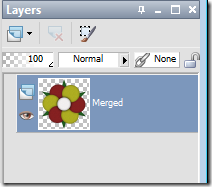
Go to your vector layer and right click. Select Delete. We no longer need the vector. Then go to Layers/Merge/Merge Visible. Your layers pallet should now have 1 raster layer to it and your image will still appear as it did before.
Using your magic wand select the area OUTSIDE the flower area. Then go to Selections/Invert. Then go to Image/Crop To Selection. This will get rid of any wasted space.
That is it! You just created an interesting flower from the flower shape we created earlier. Save the file to your graphic collection and if you would like as a tube.
I hope you enjoyed this tutorial! Play with it and see what you can come up with. But most importantly…have fun!







No comments:
Post a Comment