So in this tutorial we are going to talk about making a satin ribbon that you can use for any of your graphic design projects. It will work in PSP 8 and up and there are no plug ins required!
Tools you will need: Paint Shop Pro and a desire to learn!
Here we go!
For this tutorial we are going to make a ribbon that is long enough to be used in a gallon paint can design.
Step 1 – Open PSP and go to File/New and use the following settings:
Step 2 – Click on your selection tool:
Then click on the Custom Selection box on your toolbar:
And use the following settings:
Step 2 – Pick the flood fill tool and fill the selected area with the color you want. For this tutorial I am going to use Blue. And our image will now look like this:
Go to Selections/Select None.
Step 3 – Go to Effects/Distortion Effects/Wave and use the following settings:
Our image now appears as below:
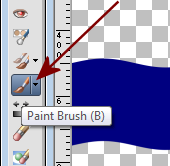
Step 4 – Go to Layers/New Raster Layer and then click OK. Now select your paint brush tool:
And use the following settings for your paint brush:
Use the settings you see in the tool bar above and then make sure your Opacity is set to 100; Blend Mode is Normal and Continuous is checked.
Now change your foreground color in your materials pallet to black and make paint strokes on the “downside” of our curves. Our workspace will appear as below:
It doesn’t need to be perfect. Now staying on this layer; change your foreground color to white and paint between the black strokes. Our image will appear as below:
Again, it does not need to be perfect.
Step 5 – With the painted layer as our active layer go to Adjust/Blur/Gaussian Blur and use the following settings:
Click OK and our image will now appear as below:
Now Double Click the layer that has your paint strokes on it and change the opacity to 60. See below:
You can change this to 50 if you are working with a lighter color and want the shading to be slightly lighter than the current shading.
Step 6 – Click on the layer that contains the ribbon to make it the active layer. Now go to Selections/Select All and then Selections/Float/ and then Selections/Defloat then go to Selections/Invert.
Make the painted layer your active layer by clicking on it and then simply press your Del key and then go to Selections/Select None. This will eliminate the excess paint we got on our workspace earlier. And our image will now appear as below:
Step 7 – Go to Layers/Merge/Merge Down. Now we have one layer to work on. Go to Effects/3D Effects/Drop Shadow and use the following settings:
Again, you can play with this to your liking.
Now, you have a finished satin looking ribbon you can use on your projects. If you want to make this into a border…..proceed to the next step.
Step 8 – Go to your selection tool and then click on the custom selection box and use the following settings:
Our image will appear as below:
Now, simply press your Del key and then go to Selections/None and you have a border.
Now you can go to Edit/Copy and then Edit/Paste As A New Image and you will have saved file size by having an image that is only the size of our ribbon. I would suggest that you convert this to grayscale for future use. To do so: go to Image/Grayscale and then Image/Increase Color Depth and select 8bit Channel. Save the file as a PNG for future use on your paint can projects and then you can simply copy and paste it to your paint can and then use the Adjust/Manual Color Correction tool.
It works well with patterns too!
Have fun! I look forward to your creations!


Awesome tut!
ReplyDelete