Nicole (Stringbean) had asked if I would put together a tutorial on how to use the Ink Saver Door Hanger Template from the WrapCandy forum. So, I was happy to create this tutorial! This tutorial was written using PSP X but will work in earlier versions as well as newer versions.
Materials Needed: – Ink Saver Door Hanger Template from the forum
Step 1 – Open the door hanger template in PSP.
Step 2 – Go to Window/Duplicate and then close out the original template. This will keep from damaging the original template.
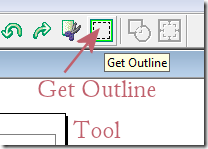
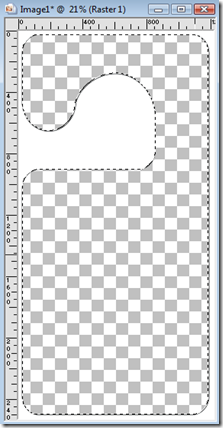
Step 3 – Using your magic wand, select the inside of the template. See images below.

The “marching ants” will appear on the inside of the template.

Step 4 – Go to Selections/Modify/Shape Based Anti-alias

Click the radio button next to Outside and then click OK.

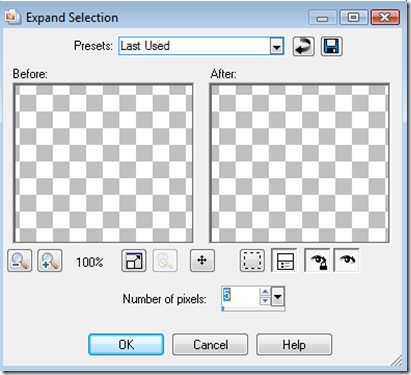
Step 5 – Go to Selections/Modify/Expand and set it to expand 5 pixels and click OK. (This will eliminate the black outline that appears on the template.)


Step 6 – Click on the Flood Fill tool to make it active.

Click on your Foreground Selection in the Material Pallet and select the color/gradient or pattern of your choice. For this tutorial I am using a solid color.

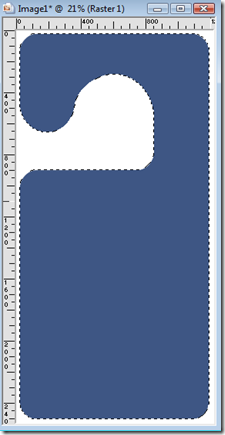
Now Flood Fill the Selection area with your Foreground Choice. Your Image will appear as below. (DO NOT DESELECT THE AREA YET).

Step 7 – Go to Selections/Modify/Contract and set contraction to 40 Pixels then Click OK.


Your image will now appear as below:

Now simply press your delete (DEL) key on your keyboard. Then go to Selections/Select None.
You now have a border around your ink saver door hanger.

If you just want a border, you can stop here. The remainder of this tutorial will show you how to add some flair using Frames/Mask and Text. So, if you want to venture on, please do so!
ADDING SOME FLAIR:
Step 8 - Let’s start by creating a rectangle box within our door hanger. Go to your Shapes tool and select the Rectangle Shape Tool.

Now place the rectangle inside the lower part of the Door Hanger. (Leave some room at the bottom to add a name to our door hanger) Your image should appear as below.

Step 9 – Click on the eye next to the border layer to make it invisible.

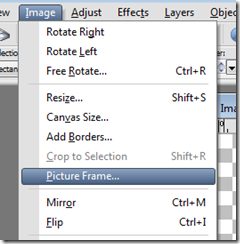
Your rectangle layer should still be active (See above that it is a different color –BLUE-) If it is not the active layer, click on it to make it active. Then go to Image/Picture Frame and select a frame to use. For this tutorial I am using the flower border frame (Edge Fun 03).

Make sure you have Frame Current Layer selected and Frame Outside Of The Image then press OK.

Your image will now appear as below.

Step 10 – Using your magic wand, select the area around the outside of our picture frame and then flood fill with white. Your image should appear as below.

Now, make your Vector 1 layer as the active layer by clicking on it. Then right click and select Delete. We no longer need the rectangle. Afterwards your layer pallet should appear as below.

Step 11 – Click on the Vector 1 Picture Frame Layer to make it active and then right click and select New Mask Layer/ From Image.

Use the following settings for your mask.

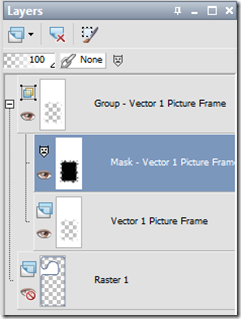
Your layers pallet will look a bit confusing, but I will do my best to walk you through the remainder without losing you! See below as to what your layer pallet will look like.

Notice that your Mask is the active layer? Click on it and drag it ABOVE the Group-Vector 1 Picture Frame. Your Layer Pallet will appear as below.

Now, Click on the Group-Vector 1 Picture Frame layer to make it active and then go to Layers/New Raster Layer. Your Layer Pallet will now appear as below.

Using your flood fill tool and your foreground material selector, flood fill the Raster 2 layer with the color, pattern, or gradient of your choice. For this tutorial I am flood filling with a pattern. Your image will now appear similar to below (with your color, pattern or gradient choice).

Step 12 – Let’s return to our Layers Pallet and make the Mask layer the active layer.

Now go to Layers/Merge/Merge Visible.

Your Layers Pallet will now appear as below.

Step 13 – Make the Raster 1 Layer the active layer and drag it above the Merged layer. Then click on the eye next to the layer to make it visible again. Your Layers Pallet will appear as below.

And your image will now appear as below.

Step 14 – OK….now let’s add a picture in the newly created frame. Open the photo of your choice and then go to Edit/Copy.

Then return to your door hanger workspace and make the Merged Layer the active layer. Then go to Edit/Paste As New Layer. Your Layers Pallet will now appear as below.

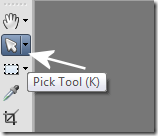
Return to your workspace and select the Pick Tool. In PSP 9 this is the Raster Deform Tool.

Click on the photo and drag it out (using the corner markers) to resize it to cover the frame area.

Your image will appear as above but without the text and arrow.
Step 15 – Make the photo layer the active layer and drag it BELOW the merged frame layer. Your Layer Pallet will appear as below.

And your image will appear as below.

If we zoom in, we can see the flowers bordering the photo. (for this particular frame, it might have been best to use a less obtrusive pattern…but it works for this tut none the less).

Step 16 – Now we will add some text to our door hanger. Make the Raster 1 layer as the active layer and then click on your Background color in the Material’s Pallet to select the color of text you want to use.

Now using the Text Tool

Add the text you want to add just below the photo. For this tutorial I am just putting the name. Your image will appear similar as below.

Notice the name is hard to read against the background? To fix this, we will need to add a drop shadow. To do that we need to make sure the Vector layer which has our text on it is the active layer. Right click on the layer and select Convert To Raster Layer. Then go to Effect/3D Effect/Drop Shadow.

Apply the drop shadow of your choice to make the text appear better. If necessary you may want to repeat the drop shadow several times depending on if you are using a solid color or a pattern as your frame layer. Once the drop shadow has been applied, the image should appear similar to below.

If you want to keep this particular frame and border for future use, save your file as a PSP file. Then go to File/Export and JPG Optimizer to save it as an image. I save as a JPG if I plan to print and cut from the Silhouette SD. Which, I will have another tut on how to print and cut from the Silhouette SD later.
Here is a sample using the same frame with a solid fill instead of a pattern.

I hope you enjoyed this tutorial. I would love to see some of the door hangers you create from it. Either with just borders, or with different frames, etc. It would be great to see all of your creations!
Happy PSP-ing!


