-->

Monday, September 27, 2010

Color Swatches and PSP

This tutorial was written in PSPX but will work in all versions.  First, if you are planning on a collaboration and want to make items matching the same color scheme for all designers, then as a team you will decide on the colors to use.

But I also like to use swatches to help me keep things consistent with designs.  For example, any color swatch on my site has 5 coordinating colors.  You would use it the same way you would a collaboration swatch. 

Once the color swatch has been created you need to save the swatch to your computer and pull it up with PSP.

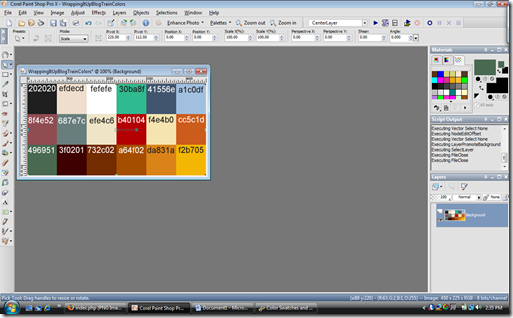
Step 1 – Open your PSP and then go to File/Open and select the color swatch.  For this tutorial I am opening the color swatch for the Candy Wrapper Blog Train (coming soon). 

image

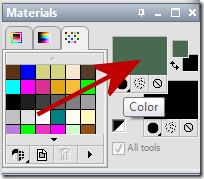
Step 2 – Select the foreground color swatch on your materials pallet

image

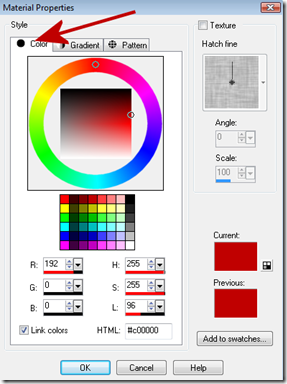
Step 3 – When the options box pops up, click on the color tab.

image

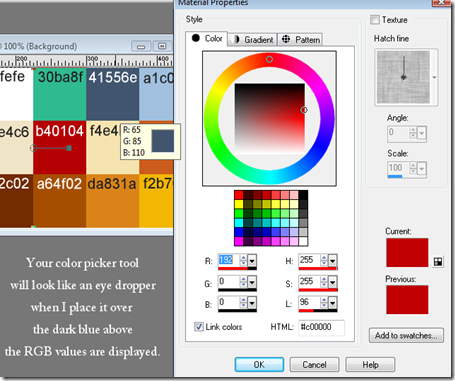
Step 4 – Place your mouse on the color in your swatch that you want to use.  As you hover over the color you will notice that the RGB values will be displayed.

image

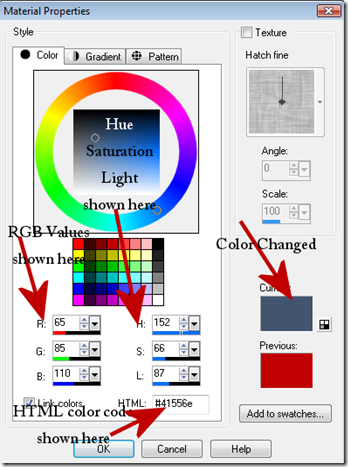
Step 5 – When you get to the color you want, left click it and the color will be loaded as your current color.  Notice how the red is set as the current color in the materials pallet above but it has now changed to blue in the image below.

image

Now you can use the color you selected from the color swatch to make your elements, papers, patterns, wrappers or whatever.  So, if, say for example, you want your paper (background) to be blue, you would select the blue color as shown above. Then when you get ready to add your textbox but want it to be say the maroon color in the swatch, you would select the maroon the same way.

I hope this has been helpful!

Sunday, September 26, 2010

Creating a Scrapbook Quick Page

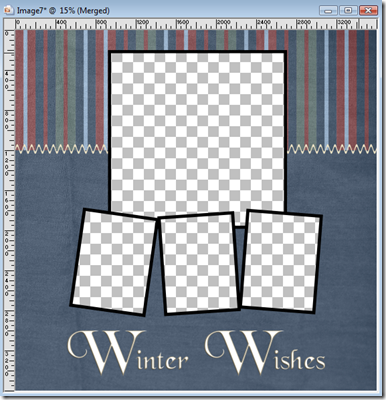
I have received an e-mail asking how to make a quick page. Thank you Shawnda for the inquiry!  It seems more often than not most scrapbooking tutorials are written for Adobe Photoshop.  This tutorial, however, was written using Corel Paint Shop Pro X.  It will work in earlier versions and newer versions as well. I used the Winter Wishes Color Swatch shared by Sharon Kegley on the Wrapcandy Forum.

Materials that you will need:  two papers and a frame.  You can download the Winter Wishes Materials for free HERE.

Got the download?  Unzipped it?  Ready to go?  Awesome!  Let’s proceed!

Step 1 – Open RDD-WinterWishesPaper2.  (Or any other paper that you want to use).

Once it is open go to Window/Duplicate.  Close out the original as to not damage the original.  Repeat for RDD-WinterWishesPaper1.  Then click on Paper 2 and the rest will be created on this image.

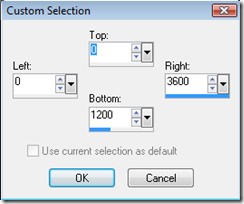
Step 3 – Make a Custom Selection (See below)image
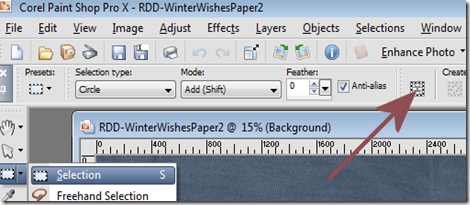
Use the following settings:

image

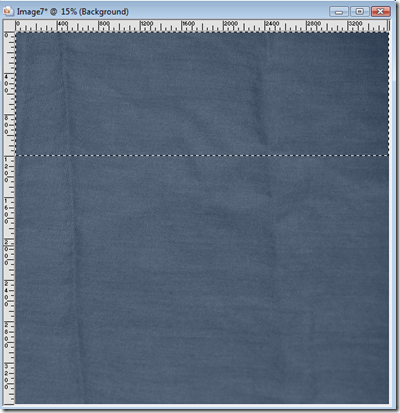
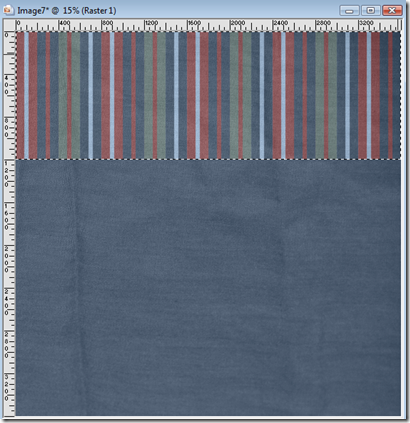
Your image should appear as below:

image

Go to: Layers/New Raster Layer and flood fill the selected area with the RDD-WinterWishesPaper1 (use your material’s pallet to select the Paper1 as your fill pattern). *** See Below ***
image

Then go to Selections/Select None.

Step 4 – Create another custom selection using the following settings:
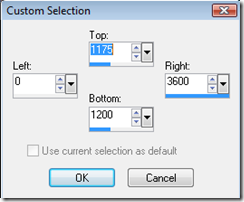
image

Go to Layers/New Raster Layer and flood fill using a solid color (this will become a stitching).  For this tutorial I am using the light pink that was given in the Winter Wishes Color Scheme. Then go to Selections/Select None. 

Go to Effects/Distortion Effects/Wave and use the following settings:
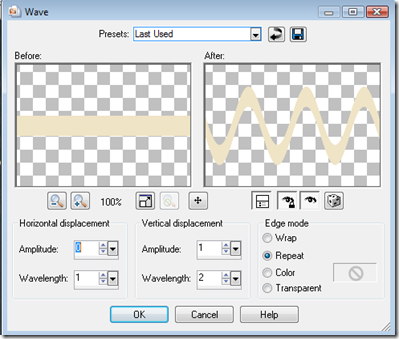
image

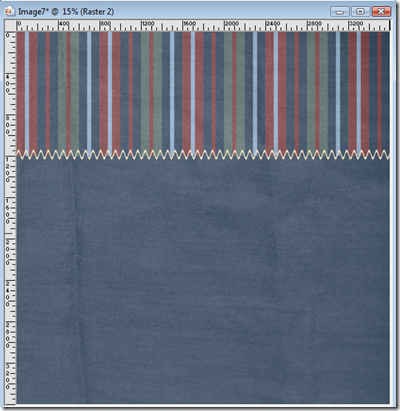
Your image will now appear as below:

image

Step 5 – Close out the striped paper pattern and open the frames file.

Still on the frames file go to Edit Copy.  Then go to your quick page and go to Edit/Paste as New Layer.

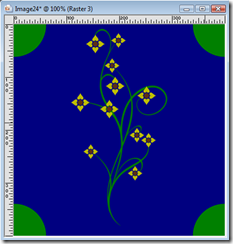
Your image will now appear as below:
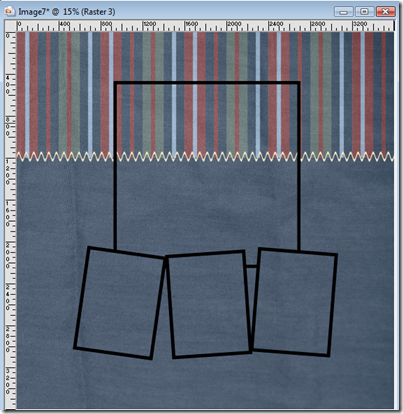
image

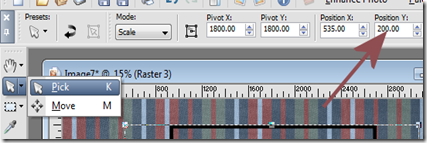
Step 6 – Using your Pick Tool (Raster Deform for PSP 9 and below), change the Position Y to 200.  (See Below)
image

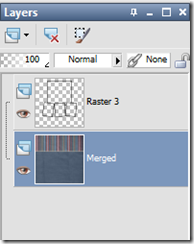
Step 7 – Make the Frames Layer (Raster 3) Invisible.  Then select the Raster 2 Layer and go to: Layers/Merge/Merge Visible.  Then make the Frames Layer (Raster 3) visible again.  Then select (click on)  the frames layer to make it the active layer.

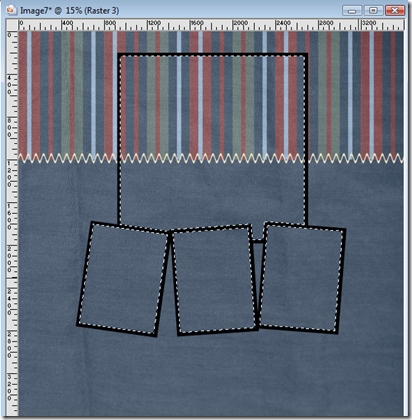
Step 8 – Using your Magic Wand, select the areas within the frame.  Your image should appear as below:
image

Select your Merged Layer

image

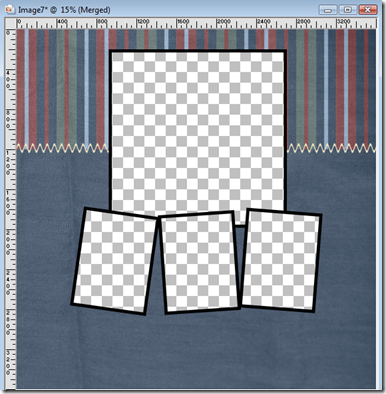
And press your Delete Key and then go to Selections/Select None and then go to Layers/Merge/Merge Visible.  Your image should now appear as below:
image

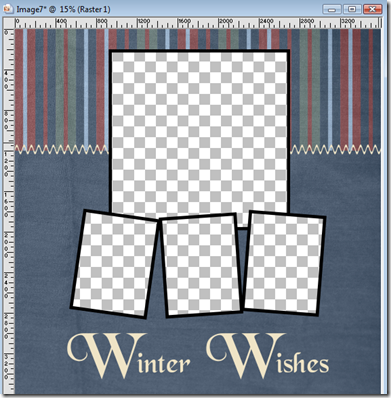
Step 9 – Add your text as you wish.  For this tutorial I am adding Winter Wishes using Font: Black Chancery with the W’s as 400 pixels and the remaining as 200 pixels.  Resized using the Pick Tool (Raster Deform for PSP 9 and below) as needed.  Then go to Scripts Restricted and use the Center Layer Script that comes with PSP.  Right click on your text layer and select Convert to Raster Layer. Then using your Pick Tool (Raster Deform for PSP 9 and below) change the Position Y to 3000.

Your image should now appear as below.
image

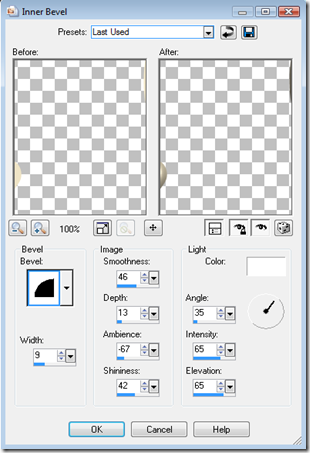
Step 10 – Optional Step – select your text by selecting any area, using your magic wand, outside the text and then go to Selections/Invert.  Then go to Effects/3D Effects/Inner Bevel and create the inner bevel of your choice.  Then go to Selections/Select None. For my inner bevel I am using the following settings:
image

Your image will now appear as below:

image

Step 11 – Go to Layers/Merge/Merge Visible and then save your Quick Page as a PNG file.  It is now ready to be zipped and ready to be uploaded to your store, blog or file sharing site.

I do so hope you enjoyed this tutorial and I look forward to seeing what other papers you might use to create the same layout and what other titles you may come up with.  It would be great to see a variety of quick pages made using this tut!

Saturday, September 18, 2010

Polka Dot Pattern

This tutorial was written in PSP X but will work in earlier and newer versions as well.  Shawnda had asked how to create the polka dot pattern.  So I created this tutorial, but you will also learn how to use other shapes for patterns as well as adding tubes to your patterns.

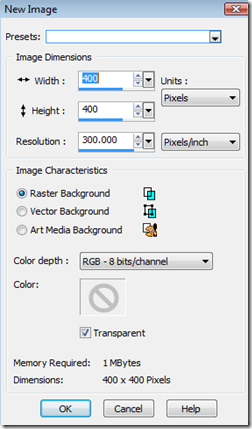
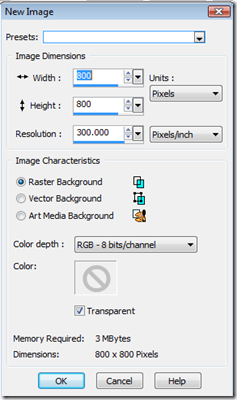
Step 1 – Create a new image using the following settings:

image

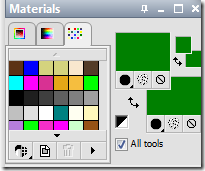
Step 2 – Set your foreground color and background color to the color of the dot that you want to use.  For this tutorial I am using Green.

image

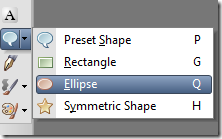
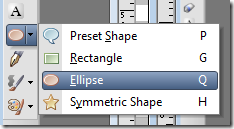
Step 3 – Using your Ellipse Preset Shape tool.  Create a circle using the following settings:

image

Mode: Draw Circle, Create on Vector, Line width 0, Anti-Alias Checked. 

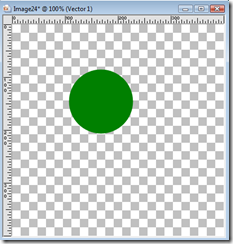
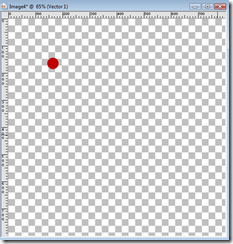
Your circle should look as below:

image

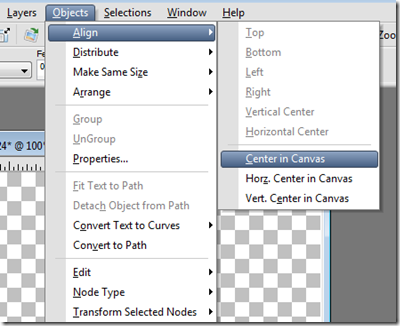
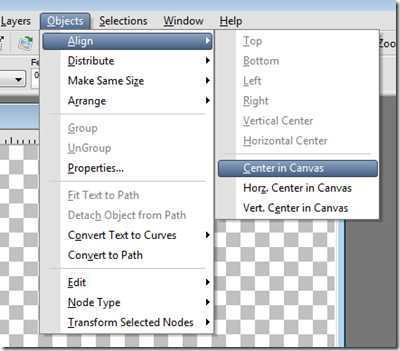
Step 4 – Place your circle in the center of the layer. Go to Objects/Align/Center In Canvas

image 

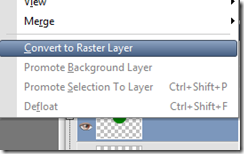
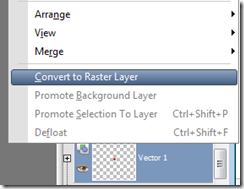
Step 5 – Right click on the vector layer and select Convert to Raster Layer.

image

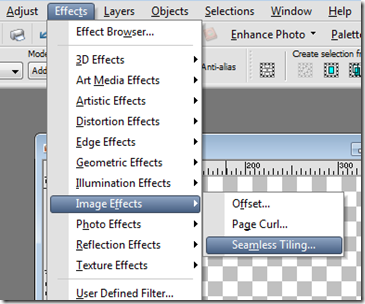
Step 6 – Go to: Effects/Image Effects/Seamless Tiling

image

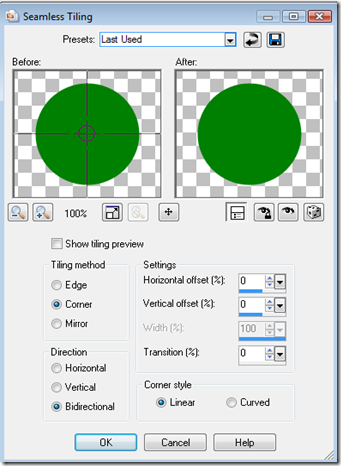
Step 7 – Set your Tiling using the following settings.

image

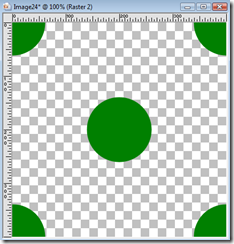
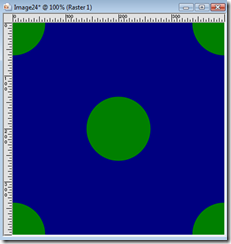
Press OK.  Your pattern should now appear as below:

image

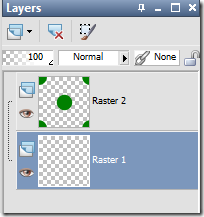
Step 8 – Select your Raster 1 Layer

image

Using your Flood Fill Tool

image

Fill with your preferred Foreground color.  For this tutorial I am using blue. Your pattern should now look as below:

image

Step 9 – Go to Layers/Merge/Merge Visible.  Your polka dot pattern is now complete.  Save as a jpg in My Document/My PSP Files/Patterns for future use.

ALTERNATIVES:

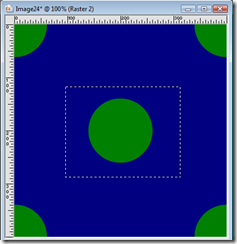
Let’s say you want to create a third color dot in this pattern.  BEFORE you merge your layers…go to your dots layer and use your rectangular selection tool select the center dot.  See below:

image

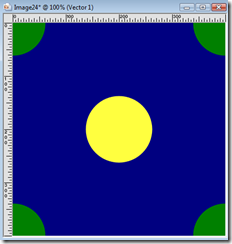
Press your DEL key and then go to Selections/Select None. Create a new ellipse using the ellipse preset shape tool using a different color.  For this tutorial I am using yellow.  Make sure you center it using your Objects/Align/Center In Canvas.  Your new pattern would look like below:

image


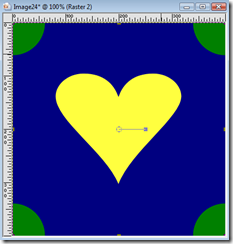
You can play with this pattern by adding smaller circles scattered around the larger dots or leave it as it is.  You can even add a different shape in the center to create a unique pattern.  See an example below:

image

Other options are to create your dots and remove the center dot and add a picture tube in the center:

image

I hope you enjoyed this tutorial and look forward to your creations!
Wednesday, September 1, 2010

MuRa’s Meister Copies and PSP

This tutorial was inspired by Leanne and her circle of dots dilemma.  This tutorial was written using PSP X but will work in 9 and above.  To complete this tutorial you will need the MuRa Meister Copies Plugin.  You can download it HERE.

Step 1 Create a New Image using the following information:

image

Step 2 – Set your foreground color and background color to the same color.  For this tutorial I am using Red.

image

Step 3 – Using your ellipse preset shape tool create a circle using the following settings:

image

Mode:  Draw Circle,  Create on Vector, Line width set to 0 and Anti-Alias checked.

Draw a circle on your canvas

image

Step 4 – Place the vector circle in the center of the canvas.  Go to Objects/Align/Center in Canvas.

image

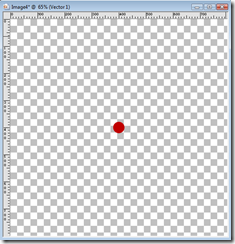
Your image should now appear as below:

image

Step 5 – Right click on the Vector Layer and select Convert to Raster Layer.

image

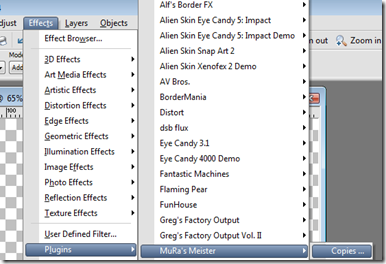
Step 6 – Go to Effects/Plugins/MuRa’s Meister/Copies

image 

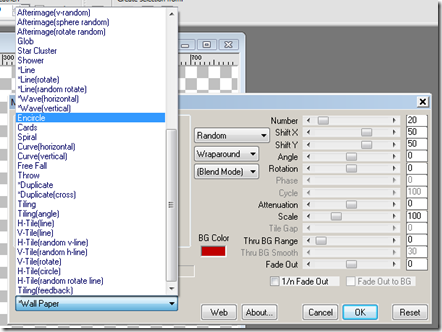
Step 7 – Using the drop down box on the bottom left, change the copies type to Encircle:

image

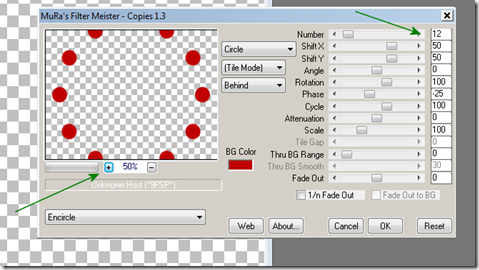
Step 8 – Zoom in 50% using the zoom buttons to view the circles closer to make sure they are not touching each other. And make sure all settings are as shown below. Change the number of dots in the circle by pressing on the arrow as shown at the top right.  Right now it is set at 12, change it to 20.

image

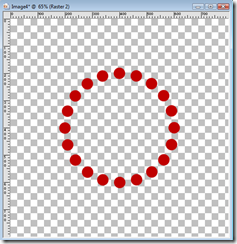
Press OK.  Your image should now appear as below. And your circle is complete. You can resize using your pick tool (for PSP 9 use the Raster Deform tool).  Play with the settings, change your copies style to make quick borders using line and even wallpapers.  The most important thing is to play with the tools and become familiar with their functions and have fun learning!

image

I hope you enjoyed this tutorial!  I look forward to seeing all of your creations!  This is awesome to use for creative paint can lids.  Let’s see what you all make!